It's been a while, but i got all shorts of shit going on. I have been "unemployed" (i actually run a free lance company that has nothing to do with airsoft) for about 10 months now and I have almost reached the situation where the SHTF i was trying to find myself other ways of financial support.
Last week, i was contacted by an airsoft shop here in Athens, in case i wanted to work for them. Since, Airsoft is the second best thing i do well i decided to take the offer. The shop is fairly new and still getting organised. It's not the biggest, it still lacks the variety of items offered by other shops, but it's strong point is customer support and warm communication.
I will try my best to contribute with my past experience and ability to search and come up with solutions...
If interested the shop is called Greek Airsoft and it's located in the southern part of Athens. Their site (which sports an e-shop (both in Greek and English) and forum (unfortunatelly only in Greek)) is here: www.greekairsoft.gr
Have a look around and for our Greek friends, they will be able to find me and chat at the shop...
Κυριακή 28 Νοεμβρίου 2010
Τρίτη 7 Σεπτεμβρίου 2010
Trasher's Toyota Hilux build up
Trasher's Toyota Hilux build up

This is how it all started with...
As mentioned in the PKM article, the best way to lighten a heavy MG is to place a pick up truck under it. Not only it gets the job done, but it also adds points to the coolness factor. And let me tell you, this truck adds a lot of points…
The truck is the 1994 Double Cab version and was bought from a Hungarian farmer for no more than 3000 euros if i remember correctly. It houses the «small» 2.4lt Diesel engine (lucky Europeans with your diesels…) with the poor 100+ something horsepower and a minimal lift on the suspension system. Initially since it’s a civilian truck, it was painted red with white rims. You can imagine how this will turn out, right?

The first thing done was to repaint it with OD with black rims. The painting was done in one of the Scorpions’ garage, since there was no point in spending money on a car that was going to be scratched by branches in the woods. Trasher calls it a «ghetto paintjob»… I can tell you that the job looks professional and there are no signs of «home made paintjob». At the same time a very basic bull bar was attached to the front of the truck.


These are taken during The Border War also. You can spot me in both the photos (yes, i am the smallest guy in the photos...)
On the way, a custom roof rack was placed above the cabin and a frame around the coach that can be covered with a tarp. Later on a snorkel was added to secure the engine intake system while crossing water barriers.

Finally the front «simple» bar was replaced with a bull bar with a winch.
Overall, it’s a job well executed and the only best thing i can think of is a Hilux with a full exoskeleton and a 3,5lt engine, a fully modded Land Rover Defender 110 or a tricked out Humvee. All these options might be cooler but the cost would be 3 to 5 times more. At the end of the day, all i can say is that i am extremely jealous…
Extended info and photos can be found at www.shooter.hu/hilux and browsing around the net for Trasher and Hilux...
This is how it all started with...
As mentioned in the PKM article, the best way to lighten a heavy MG is to place a pick up truck under it. Not only it gets the job done, but it also adds points to the coolness factor. And let me tell you, this truck adds a lot of points…
The truck is the 1994 Double Cab version and was bought from a Hungarian farmer for no more than 3000 euros if i remember correctly. It houses the «small» 2.4lt Diesel engine (lucky Europeans with your diesels…) with the poor 100+ something horsepower and a minimal lift on the suspension system. Initially since it’s a civilian truck, it was painted red with white rims. You can imagine how this will turn out, right?
The first thing done was to repaint it with OD with black rims. The painting was done in one of the Scorpions’ garage, since there was no point in spending money on a car that was going to be scratched by branches in the woods. Trasher calls it a «ghetto paintjob»… I can tell you that the job looks professional and there are no signs of «home made paintjob». At the same time a very basic bull bar was attached to the front of the truck.


These are taken during The Border War also. You can spot me in both the photos (yes, i am the smallest guy in the photos...)
On the way, a custom roof rack was placed above the cabin and a frame around the coach that can be covered with a tarp. Later on a snorkel was added to secure the engine intake system while crossing water barriers.
Finally the front «simple» bar was replaced with a bull bar with a winch.
Overall, it’s a job well executed and the only best thing i can think of is a Hilux with a full exoskeleton and a 3,5lt engine, a fully modded Land Rover Defender 110 or a tricked out Humvee. All these options might be cooler but the cost would be 3 to 5 times more. At the end of the day, all i can say is that i am extremely jealous…
Extended info and photos can be found at www.shooter.hu/hilux and browsing around the net for Trasher and Hilux...
Trasher's PKM airsoft project. A brief interview...

Well, I guess we all have been fascinated in the past by our dear John Rambo dwelling his M60 machine gun around with ease. Most probably because it’s an airsoft replica made by Top ,100% made out of plastic, so his fake muscle don’t even feel that… Has that movie affect you? Do you want to shoot your 7,62mm big ass machine gun? Well, then cowboy the fuck up and get a PKM. What? No airsoft company is making one? Hhhhmmm, if it ever comes out and it’s made by Inokatsu, it’s gonna cost a zillion euros? Well, then again, cowboy the fuck up and get a real one and convert it!!!!!!!!!!!!!!!!!!!
Once more, the man who does wonders has spoken. Mr. Trasher from the Scorpions team in Hungary is delivering lessons of airsoft mechanics and modding. Let’s see…
V: Trasher, it’s always good to have a chat with you. Especially when I wake up in the morning and I feel that my day is gonna be boring and I desperately need something to shake my water.
T: In this case, I got something for you. An airsoft version of the PKM, a real steel conversion.
V: Are we talking about the same «10+ kilos, big ass, huge, look at me I am fucking Spetsnaz shooting with one hand, PKM»?
T: Yes, more or less…
V: How the hell did you get your hands on something like that? Aren’t they supposed to be still used by the Military in the ex-Eastern Block?
T: PKMs are still heavily used all around the world, by regular or irregular armies, or private military contractors. Since these guns can take a lot more beating than the average AK, it’s quite diffucult to find deactivated ones, and typically they cost a fortune. Patience is the key.
V: Where did you acquire yours?
T: I bought it from a german company specialising in militaria and deactivated guns. It had all the proper proofmarks and paperwork.
V: Let me guess, it’s a little bit more pricey than the average Chinese clone out there, ugye? ( that means “right” in Hungarian, I am just purely showing off at this point…)
T: Basically, they come in different prices depending on condition. They can easily go as high as 1500 euros “new in the box”. I got mine for around 700 EUR, because some parts were damaged or missing.
V: So, one shinny day the mail man brought you a huge-mama package with the PKM inside. Then? I guess any kind of gearbox is not exactly “plug and play”.
T: Definitely not. I went to a friend of mine, a licensed gunsmith, and we gutted the whole thing. Receiver, trigger box, trunion, feeding tray was all cut, machined, irreversibly modified so this PKM now is more “dead” in real steel terms than ever before. The most difficult part was the barrel.
V: Ok, let’s start things from the rear to the front. What about the gear box?
T: We installed an A&K M249 gear box, which surprisingly fits with minor modifications and even more surprisingly, it was perfectly aligned with the bore. The internals of the gear box are now stock. Maybe in the future, I’ll upgrade it, but for the time being I am just trying to finish the project (which is still in progress at the time of this writing).
V: What about the hop up system?
T: Before installing a hop up, we had to work on the barrel. A special tool was made (for about 100 euros) and we bored out the barrel, removing the hard chrome plating and rifling altogether. Then the chamber was also destroyed, enlarged to fit the whole hopup unit inside. We retained the original quick barrel change feature, everything works like on the real steel counterpart.
V: So, you got the gear box and the barrel ready. Hop up? If you ever need one… The greatness of this piece is enough to spit out BBs at 700 FPS with a flat trajectory of 120 meters without a hop up system!!!!!!!!!!!!!
T: Come on, you are exaggerating all my AEGs are well under 400 fps these days… And I think the gearbox would crack under such a heavy spring. The hopup system is identical to the A&K M249 (with a Guarder 70 rubber inside) and is completely recessed in the outer barrel. We had to make an adapter from aluminium to feed the BBs, but the whole system is pretty consistent - the chrono showed 1-3 fps shot-to-shot variation when we first checked it. The ROF is satisfying, but nothing special.
V: I bet the inner barrel is quite long, right?’
T: Yes, we installed a 59cm long Gaurder tightbore (PSG length), it adds a little extra fps, but nothing special. The flash hider was also modified to take the barrel.
V: What about the magazine feeding system?
T: At this moment it uses the M249 system with some mods (like the adapter mentioned above). The metal tube is going from the left side of the receiver to the ammo box (manual or electric), it’s nothing special. With the modification of the hopup chamber, I can re-route the metal tube through the bottom of the receiver (through the drain-hole) to make the PKM look more realistic, but that’s something I’ll do later. Since I hate electric winding mags with a passion, the first boxmax was manual winding with the mech of an AK hi-cap inside. The capacity is around 4000-5000 BBs maybe? My electric boxmag uses MAG mini-SAW internals and runs on AA batteries.
V: I know that you have used the PKM in “The Borders War” in the Czech Republic. What do you think of it so far?
T: I used it as a support gun for day and night missions, but also for defense when rebels overran our understaffed base. With a handful of guys we managed to keep them at bay for about 30-45 minutes. I kept moving around the perimeter, the PKM worked flawlessly, cutting down flanking and rushing rebel elements. I was firing from the kneeling or standing position most of the time. It was a good fight… until the battery died. Then we all got killed…

Trasher with his PKM in The Border War last year in the Czech Republic...
V: Trasher, thank you for your time and your kindness once more. I really appreciate for all the information you shared with me about your build.
T: Don’t even mention it. It’s my pleasure.
PKM specs
Length: 116 cm
Weight: around 10-12 kilos (with boxmag and battery).
ROF: 750-800
FPS: 370-380
Effective range: 55-65 meters

Trasher's Hilux in the game. Notice the PKM sticking out the window...
As the weight of the PKM is a little more than the average AEG out there, the Scorpions team decided to make it easier to carry by adding a Toyota Hilux under it!!! Not a bad choice if you ask me… More on the Toyota is found here.
The whole photo set can be found here http://www.shooter.hu/pkm
Τρίτη 31 Αυγούστου 2010
Paracord Water Bottle Koozie

Hi all,
It seems that I got too much free time in my hands and I just can’t sit tight. Browsing around the net I came across some interesting constructions made with Paracord. Actually I have done some Paracord bracelets in the past, but this time it’s something different. I saw some guys making Paracord covers for their water bottles. I usually carry with me a water bottle and I thought, why not?
Since last week I had with me a Nalgene 1lt bottle (32oz for the non-metric people…) but I realised this summer that it is too big for my Fatboy, so I bought me a ½ lt one (17oz…). Unfortunately the only one that could be shipped to Greece was a purple one, but it still gets the job done. At the same time i purchased some Safety Red paracord (it’s not very Milsim styled, but i want for EDC) and started working… With no further delay, here it is…


Details of the fastening around the neck of the bottle.

The beautifull skull beads around the fastening

The koozie removed from the water bottle. This should hekp when washing is needed...
MATERIAL NEEDED
The material needed are not something extraordinary or rare, in fact some of our readers can purchase them in their local Walmart or so. For me i had to purchase them from Ebay as usual…

• The desired volume water bottle. I used a Nalgene bottle but it could be any other bottle, plastic or metal, it’s up to the user
• Paracord. I used Safety Red one, because it makes the bottle more visible, as i plan on using my bottle as an EDC (work, cycling, hiking, etc…). For the small ½ lt bottle i used around 10 metres (30 feet…) of it
• A pull cord stopper
• Two beads if wanted for decoration purposes
• The usual stuff needed for Paracord braiding like a lighter and tweezers.
THE BRAIDING

It all starts with a single loop of Paracord around the neck of the bottle. The length of it should be enough to allow it to tighten and loosen in order to remove the cover. I used some extra length so i could use some decorative beads at the end. In the photo i show a Coyote piece of Paracord to make it obvious…
Then, I just did a simple loop around the initial loop. It is simple as it is shown. Remember that at the end the beginning the cord must be knotted to be secure.
Grab the cord and bring it under the initial loop and pull it all the way. Leave some to create the eye of the netting.
Then bring the cord back and put it in the eye and pull it all the way. The length of the loop will determine how big the eye will be. Don’t make it too tight cause you will have to do this endlessly…
Go over and over again… I did about 8-10 eyes around each row and it took me about 2,5 hours. With smallers eyes it could be 1 hour and with smaller eyes it could take hours and hours…
At the end just tighten the knots to secure the Paracord at the bottom. As it’s usually done with Paracord, cut the cord and melt it with the lighter. Personally i also use some Super Glue on the final knot to secure it even more.
If desired you could put some beads on the initial loop (photo 1) or just make a knot. Again melt the ends, glue them and it’s done. Now go out there and hydrate!!!
Πέμπτη 11 Φεβρουαρίου 2010
SADF M83 chest rig
Since some time now I have been trying to reduce the amount of my tactical nylon by categorizing my gear according to the AEG platform used. So, I was looking for a platform to accompany my AKs, both for CQB and woodland games. I could just go the modular way and built it up. The problem lies there, because high speed gear manufacturers got the AR users in mind. Usually AK magazine pouches advertised as “doubles” are actually “triples”. For some reason they believe that the AK users need 50% more ammo compared to AR users to get the target… Stereotype believing, player haters I say… So, I started looking to old school gear made for the AK platform. During a chat over at Wannabe forums, the user named Optactical suggested the M83 chest rig. I looked into I, gathered all the info I could and I thought I should give it a shot. Lucky me. That’s the solution to my problems…

I spotted a M83 chest rig at ebay for 35 bucks and I purchased it, hoping for the best. 2 weeks after I paid for it, the post man brought a USPS package at my door. I opened it and I felt in love with what I saw inside. The SADF M83 chest rig…

MATERIAL AND COLOUR
The rig is made by ballistic nylon. Ballistic nylon is actually Cordura fabric. Of course there is no “Cordura” label since Dupont patented the name, after the M83 was produced. The colour is “Nutria Brown” which is a darker hue of what today would be described as Coyote Brown. Absolutely lovely … The finish of the rig and the straps are black like the fastenings. The stitching is really reinforced where it matters. In the following photo is obvious that the Nutria Brown blends with the MARPAT pattern extremely well...

LAYOUT
The design is fairly simple. The rig is just a rectangular panel with 4 pockets. Starting from the right side (wearing it) there is a relatively big pocket designed for the field trauma kit. Actually I intend having my PMR radio in there. Next to it and to the center there is a big pocket divided in 3 double cells for the magazines. Each of the double cells is covered by a flap that closes with a Velcro strip. To the left hand side there are 2 smaller pockets. One is the original radio pouch and a grenade pocket. The grenade pocket is way too small, so most probably I will rest spare batteries in it. The other one will be used as a general purpose pocket filled with speed loaders, extra flash light and a multi tool or so.
The rig is kept in place by 3 straps. 2 leaving the rig going up to the shoulders and to the back and 1 that secures it around the waist. The shoulder straps are thickly padded and they are very comfortable. A very useful feature of the straps is that they are quite far apart. Usually chest rig straps tend to be close and usually dig in the rear of the neck when loaded. No problem here…
The whole panel is backed with heavy duty mesh. To the rear of the panel there is a flat pocket for maps, intel, etc covered with a flap secured with Velcro.

 The magazine pouches fit AK magazines really well. Even thought it was originally designed for the R4 and R5 rifles (the SA version of the Galil) which look like STANAG magazines on steroids...
Bottom line, it's a well built, durable, well designed chest rig. I can't be happier with one...
CQB/Urban protection helmet
Well, the title is quite catchy cause i had no idea what to call that thingy... It all started once upon a time when i wanted to start putting together a Black Kit for CQB games. Initially i was (and still am...) against black gear. I believe they look crappy, they don't help unless you play in night games and finally they are so passe... I decided to go that way because the rest of the team wanted to do so, so...
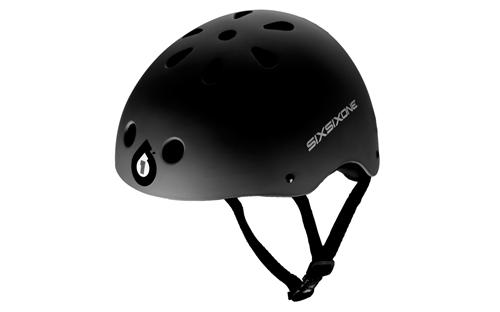
So, i looked around for a Protec style helmet that was mainly going to protect my head. It had to be non-military looking. I found on sales (cheap bastard...) at Chainreactioncycles a 661 Dirt Lid. I bought the black one to help my aftermarket work. I chose the small size on purpose. Usually helmets look huge on me, so i went for the small one and later i removed the inner crap and got left with just a light padding.
Everything started like this:
and ended like this:


Interesting, ehhhhh? Well, it's not that difficult and crafty after all...
The Velcros
The Velcros is nothing fancy. Just cut some stripes of black velcro and used hot melt glue to paste them down. I added extra glue all around them to secure them. I didn't bother painting the glue, since the helmet was gonna be painted.
The Bling Bling
Well, i tried (and insist on the word "tried"...) to keep this one fairly simple... Well, i just put an NVG mount, a Helmet Light and a pair of extra glasses on it. It's light, innit?
Actually the NVG mount is the one i had from my MICH wannabe. It's meant for the PASGT helmet, but it stays on this one just fine. For some reason i love the way that this mount with the plastic safety clip looks on a non-military helmet.

As it was made for CQB games, i liked to have some light on it. So, i want the more high speed way and purchased a replica of the Surefire LH1 light. Originally it was black, but it got painted like the rest of the helmet. I have to mention here, that this light is supposed to be mounted on thick Kevlar helmets. I had to modify it to fit on a plastic shell like mine. I also removed some part of my helmet to make it sit correctly. Finally i avoided installing it on a level parallel to the ground. It's a freakin light, it's supposed to light my path. So, i made it look at about 45 degrees. This way, it gives me the ability to see where i am going, but beong able to see who is coming my way at the same time...

The paintjob
Inittialy i was gonna leave it all black... But i am happy to announce that our team is getting rid of the Black Kit. Thanks God of Airsoft!!!!! I wanted to keep the helmet, but the black had to go. Since the other one is desertish, i had to find some paintjob for this one that would be different. I chose the following colours:

I didn't use a spesific pattern. I just laid a plastic sheet with a very small net and applied mists of colours from a distance. I applied light coats in order to avoid coverring 100% of the black underneath. I am very happy with the result as i believe that it would work in CQB, Urban and Woodland games (at least under spesific circumstances).
Till next time folks...
So, i looked around for a Protec style helmet that was mainly going to protect my head. It had to be non-military looking. I found on sales (cheap bastard...) at Chainreactioncycles a 661 Dirt Lid. I bought the black one to help my aftermarket work. I chose the small size on purpose. Usually helmets look huge on me, so i went for the small one and later i removed the inner crap and got left with just a light padding.
Everything started like this:
and ended like this:


Interesting, ehhhhh? Well, it's not that difficult and crafty after all...
The Velcros
The Velcros is nothing fancy. Just cut some stripes of black velcro and used hot melt glue to paste them down. I added extra glue all around them to secure them. I didn't bother painting the glue, since the helmet was gonna be painted.
The Bling Bling
Well, i tried (and insist on the word "tried"...) to keep this one fairly simple... Well, i just put an NVG mount, a Helmet Light and a pair of extra glasses on it. It's light, innit?
Actually the NVG mount is the one i had from my MICH wannabe. It's meant for the PASGT helmet, but it stays on this one just fine. For some reason i love the way that this mount with the plastic safety clip looks on a non-military helmet.

As it was made for CQB games, i liked to have some light on it. So, i want the more high speed way and purchased a replica of the Surefire LH1 light. Originally it was black, but it got painted like the rest of the helmet. I have to mention here, that this light is supposed to be mounted on thick Kevlar helmets. I had to modify it to fit on a plastic shell like mine. I also removed some part of my helmet to make it sit correctly. Finally i avoided installing it on a level parallel to the ground. It's a freakin light, it's supposed to light my path. So, i made it look at about 45 degrees. This way, it gives me the ability to see where i am going, but beong able to see who is coming my way at the same time...

The paintjob
Inittialy i was gonna leave it all black... But i am happy to announce that our team is getting rid of the Black Kit. Thanks God of Airsoft!!!!! I wanted to keep the helmet, but the black had to go. Since the other one is desertish, i had to find some paintjob for this one that would be different. I chose the following colours:
- Dust Grey by Montana
- Dark Brown by Humbrol
- Manilla Green by Montana

I didn't use a spesific pattern. I just laid a plastic sheet with a very small net and applied mists of colours from a distance. I applied light coats in order to avoid coverring 100% of the black underneath. I am very happy with the result as i believe that it would work in CQB, Urban and Woodland games (at least under spesific circumstances).
Till next time folks...
Εγγραφή σε:
Αναρτήσεις (Atom)